To use EVE IPH to its fullest potential, you must authorize the application to view your characters' details through CCP's Single Sign On (SSO) Authentication system, called EVE Swagger Interface (ESI). Through the Autheticated API access option, this sytem allows IPH to access your selected permission scopes to read things like your character's assets, skills, and blueprints. This process also ensures that you have control of access to your character API and you can remove that access at any time. Additionally, to keep your information secure as possible, any information about this application is available to only you.
The following steps will allow you to register EVE IPH as an application and allow you to utilize API access within the program.
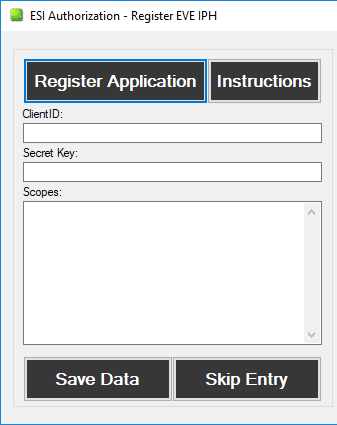
You are probably here because you clicked the "Instructions" button on the ESI Authorization window in EVE IPH. This window is where you will store data from each of the steps on the form on the right.
All information you enter on the form will be saved locally on your computer in the installation directory as "AppRegistrationInformation.xml" if you wish to access, edit, or delete it. This is for security reasons and ensures you have total control over EVE IPH's access to your character information. Finally, if you don't want to register the application and use API data, you can select 'Skip Entry' to use the dummy character.
The first step to registering the application with CCP through
their webiste. To do this, first go to https://developers.eveonline.com/.
You should see the following at the top of the screen: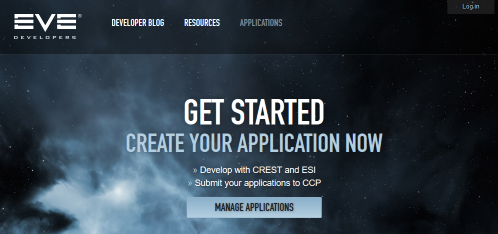
 Click 'Log in' to log in with the account from
which you want
to manage this application. The account you use will be the only way
you can manage the application after it is created. After you have
logged in, click on 'MANAGE APPLICATIONS' to
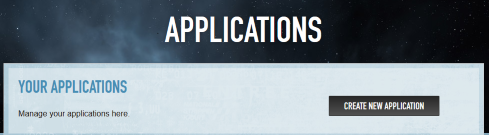
begin adding an application to the system. You will see
the screen on the left. Click 'Create New Application' and go
to Step 2.
Click 'Log in' to log in with the account from
which you want
to manage this application. The account you use will be the only way
you can manage the application after it is created. After you have
logged in, click on 'MANAGE APPLICATIONS' to
begin adding an application to the system. You will see
the screen on the left. Click 'Create New Application' and go
to Step 2.
After clicking on 'Create New Application', you will see the form on the left.
Enter an application Name, Description, and select 'Authentication & API Access'. You can name and describe it anything you want but you should use something that will help you remember the application in the future, if you want to update these settings.
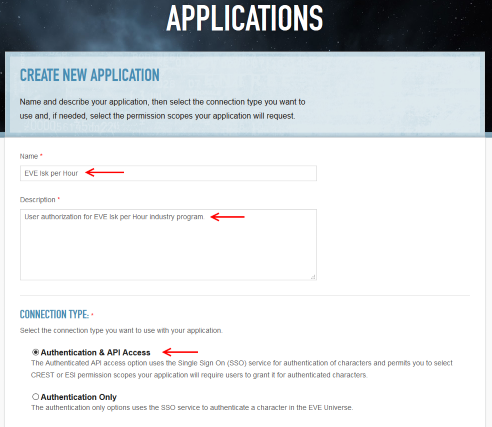

Permissions to read_skills is required to use IPH. Additionally, CCP will periodically update these permission versions (v1 to v2, etc.) and you will be able to update that access here.
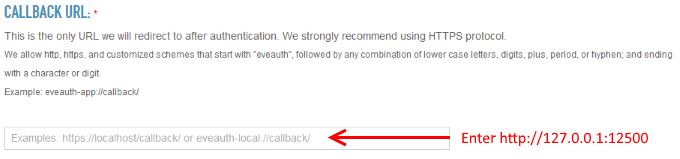 Below permissions, you will
now see an area for entering a callback URL for CCP to return data that
IPH uses to authorize the program and give access to the scopes you
have selected. Where indicated in the box, type
'http://127.0.0.1:12500'. 127.0.0.1 is the IP address for 'localhost',
which is your computer and 12500 is the Port IPH will use to connect and transfer ESI data.
Below permissions, you will
now see an area for entering a callback URL for CCP to return data that
IPH uses to authorize the program and give access to the scopes you
have selected. Where indicated in the box, type
'http://127.0.0.1:12500'. 127.0.0.1 is the IP address for 'localhost',
which is your computer and 12500 is the Port IPH will use to connect and transfer ESI data.
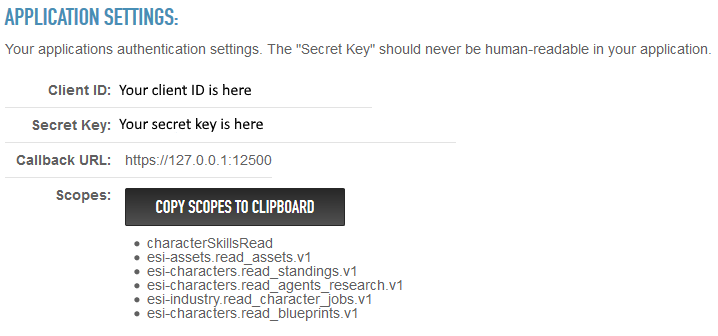
| 1. Enter the Client ID in the Client ID box. |
| 2. Enter the Secret Key into the Secret Key box. |
| 3. Hit the 'Copy Scopes to Clipboard' button and then paste the results into the Scopes box. Note, if you want to enter them manually or edit them, each scope must be separated by a space, comma, or return/linefeed. |
| 4. Hit the 'Save Data' button and you are done! |